

Follow us on Pinterest for tons of great kids activities and ideas.

Even with the weather turning colder and the rain becoming more frequent, we are determined to get outside as often as we can. I find the kids sleep better when they've had a chance to run around outside during the day and it's one of the easiest ways to keep them entertained.
A while back I finally got around to turning the pile of bricks I'd been saving into a wonderfully simple, and now much used, mud kitchen. It turned out that I should have made it ages ago instead of just thinking about it as in the end, it was so much quicker and easier than I'd imagined. Armed with that knowledge, last weekend I decided we would finally build the water wall that we'd be talking about for ever.

Materials for a water wall
The list of materials you could use to make your water wall is quite extensive and completely up to your budget, imagination and what you have on hand. Above are the materials that we used.
You will need:
|
Things for attaching
|
Materials for water to travel through
- recycled plastic containers
- recycled plastic bottles
- PVC pipes/connectors
- funnels
- guttering
- flexible piping etc.
- You will also need a large plastic tub to catch the water at the bottom so you can reuse it.
I purchased the piece of lattice and the PVC pipe and connectors from our local hardware store for around $25 in total. The highest cost was the lattice which was about $11. I wanted something that would be portable enough to move around to different locations in the yard if needed and unfortunately I couldn't find anything suitable around my yard. The rest of the materials I sourced from around the house and shed.

You will need a Stanley knife/box cutter or similar to cut appropriate holes in your recycled plastic materials to allow the water to travel through.
Handy tip: don't stress too much about making exactly the right sized holes. It can be difficult cutting through plastic depending on the thickness and it's easy to cut holes bigger than you might like (meaning the water will flow through too quickly). Just cover any gaps with electrical tape so that it's the desired size.

Assembling a water wall
- Prepare all your materials so that they allow for water to flow in different ways through them.
- Lay out all of your materials until you have a configuration that you're happy with.
- Photograph your design idea so that you can remove all the materials in order to attach them easily but still have a reference of how you plan on assembling them.
- Attach your materials using whatever is the easiest for you. The quickest way would probably be with an electric drill and screws (we didn't have the right length of screws or nails so had to go with cable ties and electrical tape which worked fine).
Alternatively, you could just use trial and error and build it as you go along, testing along the way. It's up to you!

Once you have attached all your pieces, it's time to test it out and make any adjustments that need to be made.

Testing it out was a very exciting part. Would it all work?
We realised once we went to put the tub underneath to catch the water, that we should have started the entire thing a bit higher up so that the lattice could sit on the ground with a tub sitting at the bottom. Never mind. We sat the lattice on top of the tub and it was fine.

We did keep in mind the height of our children when making the water wall but it still ended up a little higher than we'd wanted so we needed to pop some steps near it so that the kids could reach the very top.
As we tested the wall, there were parts that needed adjusting to properly catch the flow of water.
Handy tip: have a few extra recycled containers on hand that you can cut and add to your design to redirect water where you want it to go. You can also always just remove any parts that are in the wrong place and then reattach them. We didn't remove anything but had to add a couple of extra containers to catch our water.

Solving one problem can lead to other problems. This is a great process for children to observe and be a part of. Whilst physically cutting and attaching the materials for a water wall might be too difficult for your child, it is great to get them involved in the planning, design and testing.
Once you've successfully adjusted your wall so that your water flows well from top to bottom, it's time to play!
Play time!

At the very top of our water wall I made a simple measuring funnel from a recycled juice bottle. I kept the lid for it so that the kids could fill the water to the desired level and then take off the cap to release the flow of water through the wall. (How cool is it that in this particular bottle, turned upside down and filled, each line represented exactly half a cup of water? Cool!)


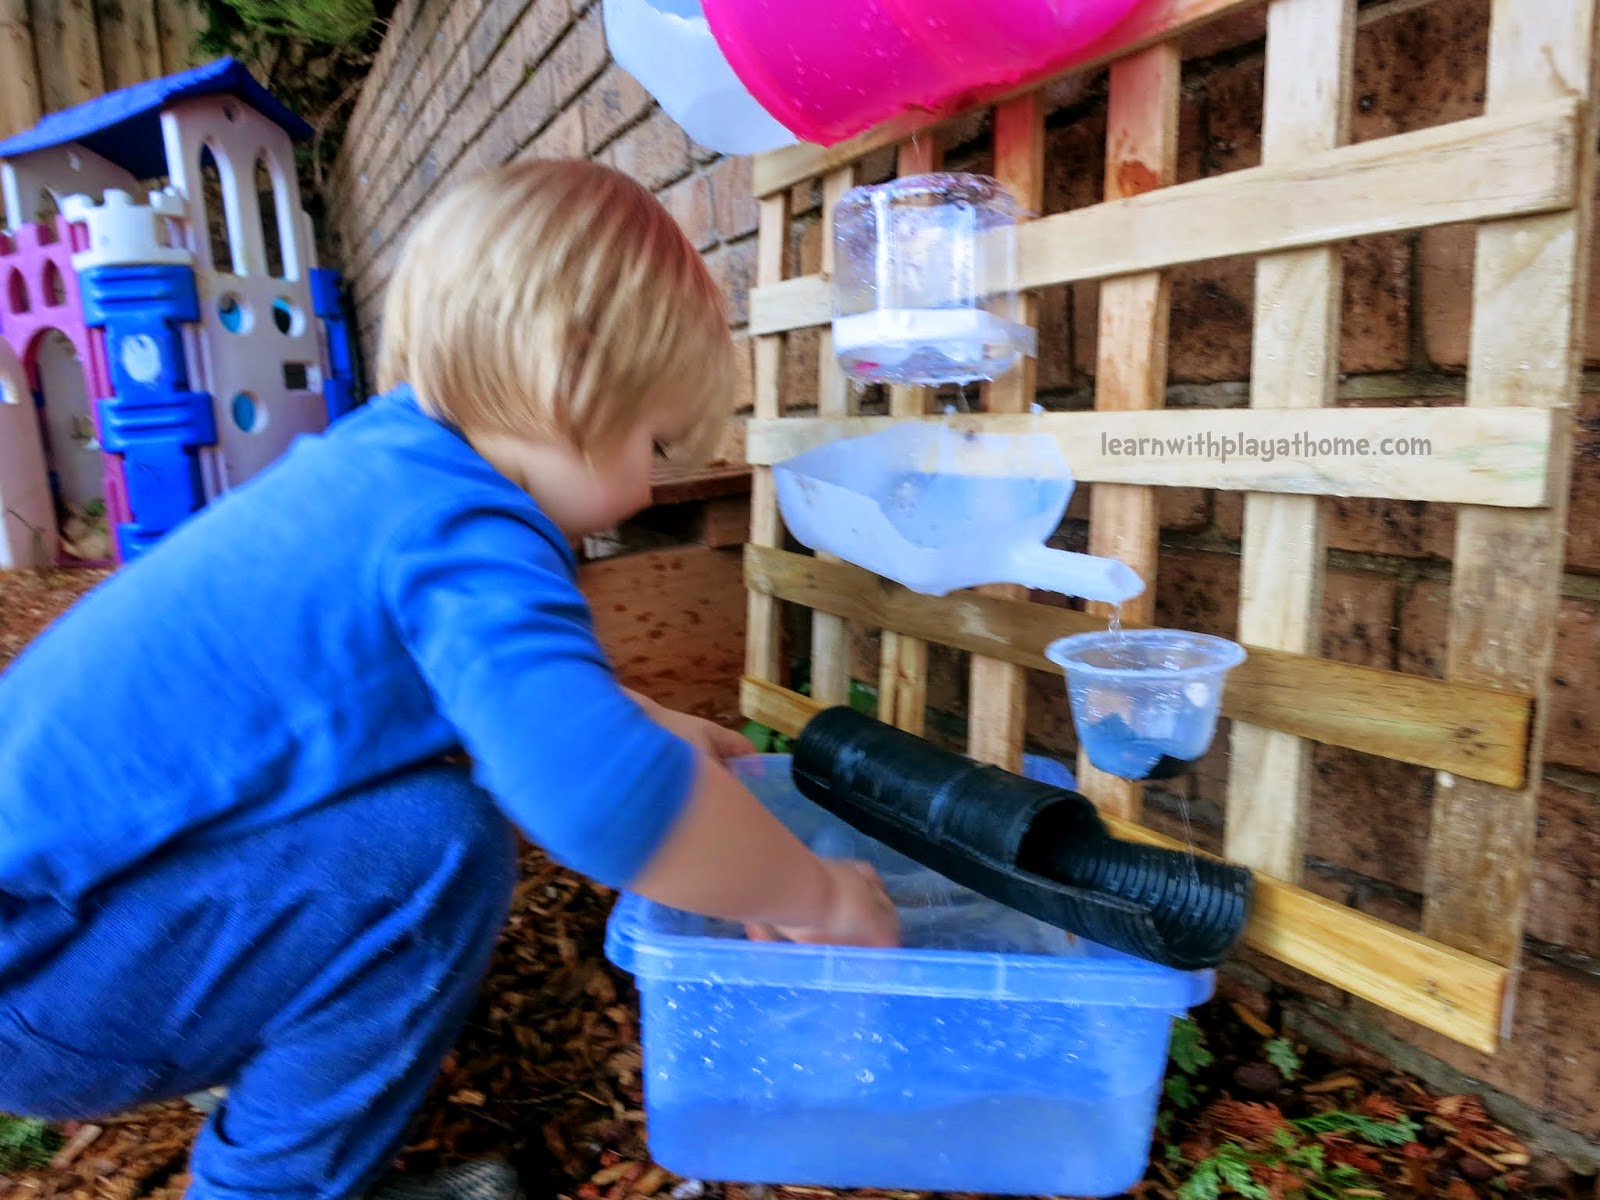


We've been having a lot of fun playing with our water wall. Not only have my children been engaged by watching gravity do its thing and helping with the problem solving, it has also been interesting chatting with the kids about why we catch the water at the bottom, why we reuse it and where water comes from.
Here are some more fabulous ideas for DIY water walls I've found around the net. Check them out for extra inspiration and ideas. They're all different!
HAVE YOU MADE A WATER WALL BEFORE?
Happy playing,
Debs :)
Look where else we are. Are you following along? :)
New Here? Subscribe to get all activities sent directly to you