

This year we thought that we'd come up with a healthy Christmas share platter, bound to stand out amongst all the sweets and treats that usually adorn the Christmas party table.
This fruit (my kids wanted to point out that some of the ingredients we use are technically fruits) and vegetable Christmas tree share platter would be perfect for taking along to a class party or family get together and is simple enough to get the kids involved in the preparation. I've found over the years that having children regularly involved in cooking and food preparation, makes them more inclined to try new things and gives them the information needed for making future choices for themselves based on their knowledge of foods, our needs and healthy living.
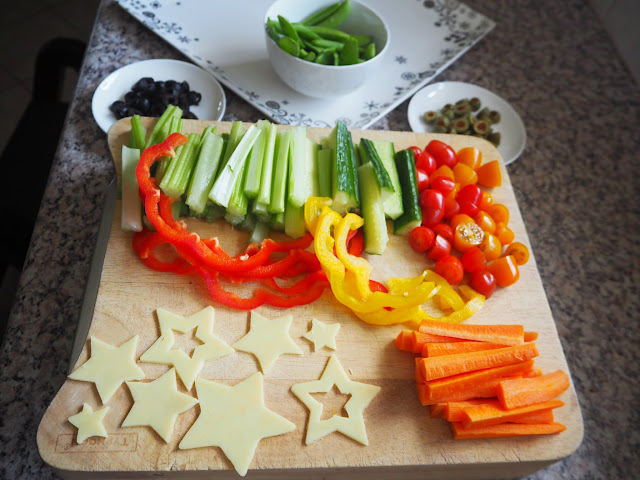
Healthy Veggie Christmas Tree Share Platter

- Celery
- Cucumber
- Snow peas
- Sugar snap peas
- Red and Yellow Capsicum (peppers)
- Red and yellow cherry tomatoes
- Olives (black and green stuffed)
- Carrot
- Cheese (cheddar cheese slices) Optional- leave out for dairy free option
Materials:
- Knife
- Chopping board
- Peeler
- Star cookie cutter (optional)
- Large platter
Don't forget, before you start any food preparation you need to wash your hands.


We really enjoyed creating this Veggie Christmas Tree and got to practice many kitchen skills, fine-motor skills and talk about different foods and healthy eating along the way. The kids (and I) were really impressed with the results at the end and it was hard to photograph before my kids wanted to dig in!
Here are some more Christmas Recipe ideas you may want to try with the kids:
Happy creating,
Debs :)
Look where else we are. Are you following along? :)
New Here? Subscribe to get all activities sent directly to you


