Showing posts with label recipes for play. Show all posts

How to make Rainbow Soap Slime

Jun 17, 2014

Follow us on Pinterest for tons of great kids activities and ideas.

My kids love messy play! A lot of the art and sensory play that we do involves a certain amount of mess, (perhaps that's part of what makes it so fun?).

One of my daughter's favourite sensory activities, that she first played with at preschool, was Soap Slime. 

Now, this is definitely messy play, but it's made from soap, so it must be clean, messy play, right? Well, sort of. It depends on the colouring. 

Since the lesson we learnt making cornflour slime, I have been hesitant to use food colouring in their messy play but hey, we won't know until we give it a try, right? 

What better way to test than with Rainbow Soap Slime.
Continue reading...


Paintsicles. Frozen paint cubes for creative fun.

Jan 23, 2014

Are you following us on Pinterest?

Thanks to a recent heat wave in Melbourne, we've been having lots of fun playing with ice. 

The other day I thought I'd combine our love of painting by making some frozen paint cubes for the kids to paint with. 

I wasn't actually sure how well it'd all turn out, but the results speak for themselves. 

I've since tested it with a variety of different paints and found that whilst the results vary, they all provide a fun, sensory and unique painting experience.


Ages: 2+  (See the end of the post for handy hints. This is a great multi-age activity)

Continue reading...


Cornflour Slime. How to make and what not to do!

Aug 8, 2013

Follow us on Pinterest


Cornflour Slime (or Cornstarch Slime) is a favourite activity of teachers and parents around the world. 

It is very popular as it's incredibly easy to make, doesn't use any nasty chemicals and has amazing properties unlike anything you may have experienced before. 

It is sure to delight young and old alike!

This is a great activity to introduce your kids to the concepts of  fluids and solids, because unlike most fluids (which are something that can flow), when applying pressure, this mixture acts like a solid. 

You can read more about the science behind why it does that, here and here.
Continue reading...


Best Ever Quick and Easy No-Cook Playdough Recipe

May 16, 2013


Play dough is a staple material for play at our house and as we use it very often, it's much more economical to make it ourselves then to buy it. 

We have tried many, many different play dough recipes over the years but our favourite, and the one we always came back to was this no-cook recipe from the Imagination Tree. They have a secret ingredient they add for extra shine so be sure to check it out. 

We've modified the method slightly over time to make it so super easy that the kids could make it with you.

With playdough this soft, silky, quick and easy to make, you'll never need to buy playdough again.

Continue reading...


How to Make Coloured Rice

Mar 1, 2013

Are you following us on Pinterest?

The other day we were making a batch of coloured rice to use for some measuring fun so I thought I'd share the details of how we made it in case you'd like to know.


It's very easy to do and you can colour it in a whole rainbow of colours for fun and interesting play and learning.


Materials: White rice, White vinegar, Food Colouring

(I have seen other people use an alcohol instead of the vinegar or even. just water. 
I use the vinegar because it helps to spread the colour evenly whilst also sterilizing 
and hopefully preserving the rice so we can get extended use out of it.)


Directions
Pour some vinegar into a bowl (or plastic ziplock bag) and add your food colouring.


You can use up to 1 tablespoon of vinegar per cup of rice.
Add as much colour as you'd like to get your desired colour.


Hint: I made 4 cups of rice so I used 4 tblsps of vinegar. 
I could have gotten away with using a little less though.


Add your rice to the bowl (or plastic ziplock bag) and stir (shake) until all the rice is evenly coloured


I lined my trays with foil and then spread out the rice for it to dry.
 (I'm always tempted to use towelling paper to speed up the drying process but I'm sure that the rice would stick to it!)


How long your rice takes to dry depends on a number of factors.

How wet you made your rice, how thinly the rice is spread and the temperature/conditions under which the rice is drying.

Hint: If your rice is very important for an activity I would suggest making it the night before
 so you are sure you will have nice dry coloured rice.

Despite it being a damp day, our rice took only a couple of hours to completely dry on the trays sitting in the kitchen.


Now your coloured rice is ready for play!

Enjoy!


Have a look at how we used this rice for some Playful Maths
(Click the picture to go to the post)
measuring activity, measuring for kids, rice play, sensory play, maths for kids, fun maths, hands-on maths

Happy playing,
Debs :)


Look where else we are. Are you following along? :)
New Here? Subscribe to get all activities sent directly to you
Enter your email address:


Delivered by FeedBurner
Continue reading...


"Recipes for Play" on Tuesday Tots

Nov 6, 2012


Welcome to this weeks TUESDAY TOTS 
Tuesday Tots is a place where bloggers from all around the world share their child friendly (kids under 5!) posts with us. 

Each week, myself and my co-hosts, Rainy Day Mum, Growing a Jeweled Rose and In Lieu of Preschool will feature some of the amazing ideas that are shared with us. 
Ideas we know that YOU will love!

Feel free to browse the list below and check out any of the posts that interest you.


FEATURED


Last week on Tuesday Tots I found some super easy, FUN Recipes for Play and just had to share them with you. You should have most of the ingredients already at home.


DIY Microwave Puffy Paint from One Perfect Day


 2 Ingredient Bath Tub Paint from Mama. Papa. Bubba.


Soapy Slime Fun from Learning 4 Kids


Sandy Oobleck from Life with Moore Babies


How to make Spaghetti "brains" from Adventures at Home with Mum


Cornflour Slime Monster Mess from My Little Bookcase


Congratulations if you were featured.  Feel free to grab a featured button.


Here's a Fun Recipe for Play from us


recipe for play

 Click here for this fun activity (only 2 ingredients!)


Now, it's your turn to link up. 
Can't wait to see what you're up to this week!


(please read the guidelines before linking up)


Happy playing,
Debs :)


New Here? Subscribe to get all activities sent directly to you
Enter your email address:


Delivered by FeedBurner

Are you on Facebook? We are and we'd love to see you there. You can also find us on Pinterest, Twitter  and G+ too. :) 
Continue reading...


How to make Cloud Dough

Jun 6, 2012


Are you following us on Pinterest?
How to make Cloud Dough


Cloud Dough, Moon Sand, Warm Snow... call it what you will, it still spells F-U-N!

We've been meaning to try this wonderful sensory experience for ages now but for whatever reason I just kept putting it off. Well, no longer, and we're oh-so happy that we tried it!

I asked my 3 year old what she thought the best name was for it after a bit of a play. She decided "Moon Sand" was the most appropriate because you play with it the same way you'd play with sand. 
You can mould it and smooth it and squeeze it and shape it, but apply a little bit of pressure and it crumbles back to flour. The difference to sand, however, is the wonderful silky smooth texture and lovely scent if you use a scented oil. This is where we see the cloudy nature coming in.
I've also seen moon sand elsewhere made very similar but with half play sand added.


cloud dough recipe. how to make cloud dough


So, how do you make it? Easy! 


Ingredients: 8 cups of plain flour to 1 cup of oil. 
***We used baby oil for the scent and also because I was able to keep a constant watch of my daughter whom I trust not to ingest any. In a preschool/school type setting or with younger kids who might ingest some, I would suggest a Canola or vegetable oil.***


Method

cloud dough, cloud dough recipe


 Now play!

                   
 Moulding with the Cloud Dough   


 Patting it down flat


Smoothing out a hill


Maddie (3y/o) loved the texture of the Cloud Dough. She just wanted to keep playing with it and touching it. She insisted on laying down so she could get up close to it and observe as she played with it.


Here are 6 more fun ideas on other ways to play with Cloud Dough for you to check out


We turn our Cloud Dough into super cold Fake Snow!


Familylicious shows you how to make Coloured Cloud Dough


My Small Potatoes uses Cloud Dough for a baking sensory bin


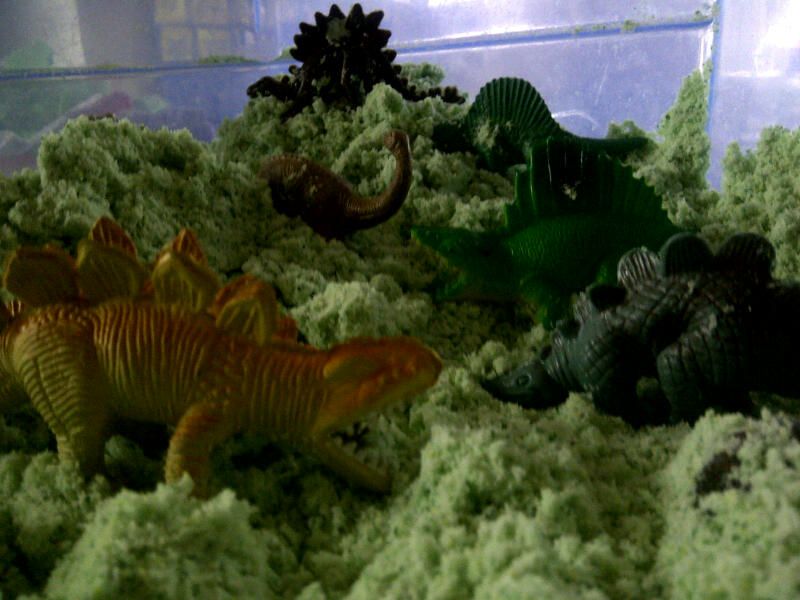
My Buddies and I coloured their's green and added some dinosaurs!


Happy Hooligans took their Cloud Dough outside for a sensory group activity

Critters And Crayons made these HUGE tubs of cloud dough for their amazing Super Hero Birthday Party.
(This looks like such a fun party, you must check it out!)


Handy Tips:

- Simplify- To simplify this activity, make the cloud dough for your child and then let them explore

- Extend- To extend this activity ask your child to half the recipe to add in some extra math. You could use cloud dough in a sensory tray to write letters, words, numbers etc. Build sandcastles with it. Can they build any with multiple levels? etc

- Begin- For your child's first time playing with Cloud Dough, I would recommend letting them play with it and explore it before adding extra tools for them. See first if they have ideas they want to do with it and if they ask you for items. (ie. I was specifically asked for a, "spatula to smooth out a hill.") You never know what your children might think of on their own. If they don't seem sure of what to do with it or how to play further, try adding some cups, a spoon, trucks, dinosaurs, popsicle sticks.. the list goes on.

- Colouring- Apparently, food dye just doesn't really work at colouring it very well. Powdered paint appears to be your best option. I'm happy with it being white. I'm planning on adding silver glitter with it next time we play.

-*** Supervise- Always supervise young children around things they could ingest. Baby oil shouldn't be ingested.***

- Mess- Eeep, this seems too messy! Yes, it isn't a completely mess-free activity but if you take adequate precautions the clean up should be minimal. If the weather is good, I recommend taking it outside as you won't have to worry about it then. Otherwise, we did ours on a tiled floor on a plastic mat. I knew some would come out of the dish so I just made the rule that none was to go off the mat. This worked fine. The small amount that went on the floor I vacuumed up in a second and the rest on the mat tipped back into the dish when we were done. Many people use it in big tubs which could also help contain it more. Don't allow children to walk on it on tiled or laminate surfaces as the oil in the dough makes it slippery.


Happy playing,
Debs :)


Look where else we are. Are you following along? :)
New Here? Subscribe to get all activities sent directly to you
Enter your email address:


Delivered by FeedBurner
Continue reading...