
Are you following us on Pinterest?

Welcome once again to the "Playful Maths" weekly series brought to you by

Together, let's make MATHS FUN!
............................................................................................................
Last week I shared Plastic Bottle Number Bowling.
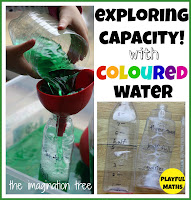
This week we bring you another 2 Playful Maths Activities using Plastic Bottles.
Today's activity from us focuses on "Measuring, Comparing and Estimating"
This activity also includes counting, pouring, fine-motor practice, hand-eye coordination practice, sensory experience, language development and imagination.
Ages: 2+
(M has just turned 4. See the bottom for handy tips to Extend or Simplify to meet your child's needs)
Making the Plastic Bottle Tools
We used recycled Plastic Bottles to make 3 tools to assist us with measuring. A scoop, a funnel and a measuring cup

Materials: 2 Plastic Bottles (one with a handle), scissors, marker.
To Make the Scoop


We used a milk bottle for the scoop. Our milk bottles are made from quite a soft, flexible plastic which makes a great scoop.

It spreads wide for easy scooping but when tipped back holds the rice in very easily.
If you want, you can then also use the scoop as a funnel, simply unscrew the lid!
To Make the Funnel & Measuring Cup

Cut around the top of a bottle to make a funnel.
(The smaller the mouth of the bottle, the slower the rice will flow through)
Use the bottom half of the bottle for a measuring cup
(we make the measuring cup together. Keep reading to see how and why)

The Play

Materials: Coloured Rice tub (or whatever you're using for measurement. eg flour, salt, water for capacity etc), Plastic Bottle Tools (see above), 1 cup measuring cup, variety of plastic cups.

Scooping and Pouring

We filled up a 1 cup measuring cup and I asked where she thought one cup of rice would fill the bottle to?
She estimated and then we checked.


Filling the measuring cup and then seeing where the rice fills up to.

I cut around the line to make a 1 cup measure from the bottom of the plastic plastic bottle
and then she had to check to make sure they would hold the same amount.

They met approval and we now had a proper plastic bottle measuring cup

I encouraged her to test some of her plastic cups to see if they held the same amount as the measuring cup, more than or less than the measuring cup?
I encouraged her to guess first and then test to see if she was right.

This cup was smaller than the measuring cup.

It held less rice than the measuring cup

This cup was larger than the measuring cup. It could hold more rice.
We talked about using measuring when we cook.
What might happen if we were making cookies that asked for 1 cup of flour.
Could we use any cup or should we use a measuring cup?
What might happen if we used the big green cup instead, or the smaller white cup? etc

We looked at all the cups and talked about which one might hold the same amount as the measuring cup.
This involved making inferences and estimation based on what she'd already experienced.
We then tested her predictions.

This one came very close!
Then I left her to her own devices to play and experiment as she wished.

She managed to get a cardboard tube from somewhere and put it to good use.

And then there was plenty of imaginative play as well.
Handy Tips:
- Simplify this activity by just giving them the plastic bottle measuring tools to play and experiment with. Try some basic counting by giving instructions like, 1 scoop of rice. 2 spoonfulls of rice. etc.
- You can Extend this activity in many ways:
- Have the child make their own plastic bottle measuring tools. What other tools can they come up with?
- Graph the results of your findings. Were there more cups that held less or more than the measuring cup?
- Make your own measuring cups of varying amounts. eg 1/2 or 1/4 cup measurements.
- Mix it up by using the bottles to create a weighing scale to compare varying amounts of rice
- Allow children the freedom to explore and investigate on their own. They will often come up with ideas or experiences that we would not have thought of. It also gives them the opportunity to make these discoveries and learn new skills themselves without being shown them.
- Did you catch our other 2 maths activities using Plastic Bottles?
(click the pictures to go to the posts)

- Below are the Paper Tube Activities from both Learn with Play at home and The Imagination Tree
(click on the pictures to go to the posts)


- Playful Maths. Below are the Egg Carton Activities from both Learn with Play at home and The Imagination Tree
(click on the pictures to go to the posts)


Don't forget to join us next week where we're bringing you more Playful Maths activities.
This time using Bottle Tops.
Happy playing,
Debs :)
Follow the entire series on our

-----------------------------------
Look where else we are. Are you following along? :)


New Here? Subscribe to get all activities sent directly to you


