Showing posts with label Healthy eating. Show all posts

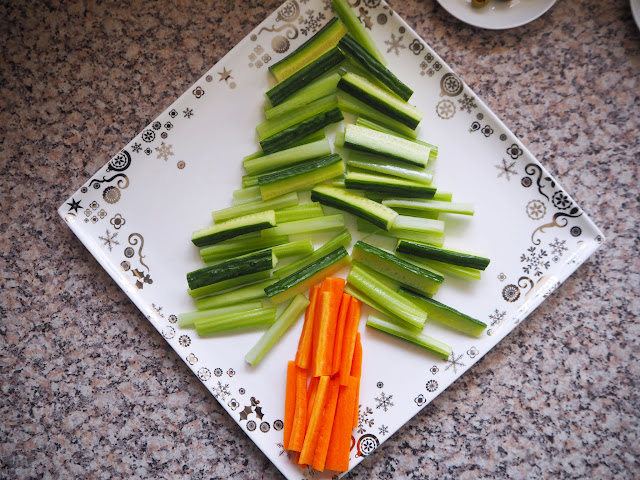
Healthy Veggie Christmas Tree Share Platter. Cooking with Kids.

Dec 23, 2015


This year we thought that we'd come up with a healthy Christmas share platter, bound to stand out amongst all the sweets and treats that usually adorn the Christmas party table.

This fruit (my kids wanted to point out that some of the ingredients we use are technically fruits) and vegetable Christmas tree share platter would be perfect for taking along to a class party or family get together and is simple enough to get the kids involved in the preparation. I've found over the years that having children regularly involved in cooking and food preparation, makes them more inclined to try new things and gives them the information needed for making future choices for themselves based on their knowledge of foods, our needs and healthy living.

Healthy Veggie Christmas Tree Share Platter

Ingredients: (we used)
  • Celery 
  • Cucumber
  • Snow peas
  • Sugar snap peas
  • Red and Yellow Capsicum (peppers)
  • Red and yellow cherry tomatoes
  • Olives (black and green stuffed)
  • Carrot
  • Cheese (cheddar cheese slices) Optional- leave out for dairy free option

Materials:
  • Knife
  • Chopping board
  • Peeler
  • Star cookie cutter (optional)
  • Large platter
Don't forget, before you start any food preparation you need to wash your hands.

Chop your carrot, celery and cucumber into sticks around the same size and length. Depending on your child's knife skills, you might want to help them with this part.
Older children can assist with the peeling and chopping of the harder vegetables.
Younger children will enjoy cutting stars out of slices of real cheese.
Halve your cherry tomatoes, olives and cut thin slices of capsicum to decorate the tree.
With your ingredients prepped, you are ready to build your tree! Children of all ages can help with this part.
Use the carrot sticks for the base and your cucumber and celery sticks to build the shape of the tree.
Layer your snow peas and sugar snap peas over and in your tree.
Arrange your capsicum strips on top of the tree for tinsel.
Decorate all over the tree with your tomatoes and olives.
For the finishing touches, add your star shaped cheese. For a dairy free option, you could cut stars from yellow capsicum.
Serve your tree fresh with your favourite dips and watch it disappear.

We really enjoyed creating this Veggie Christmas Tree and got to practice many kitchen skills, fine-motor skills and talk about different foods and healthy eating along the way. The kids (and I) were really impressed with the results at the end and it was hard to photograph before my kids wanted to dig in!

Here are some more Christmas Recipe ideas you may want to try with the kids:

Happy creating,
Debs :)


Look where else we are. Are you following along? :)
New Here? Subscribe to get all activities sent directly to you
Enter your email address:


Delivered by FeedBurner
Continue reading...


Cheese and Veg Muffins. Cooking with Kids

Oct 14, 2014


Getting a little bored of sandwiches in the school lunchbox, and wanting to include some different vegetables, we thought we'd make some yummy Cheese and Veg Muffins.

Involving the children in the cooking process meant they were much more likely to give them a try and it gave us plenty of opportunities for chatting about foods and healthy eating, as well as engaging the kids in the math, science, literacy and kitchen skills that come with cooking.

We've previously made a savoury ham, cheese and spinach muffin with great results so it was easy for us to tweak this one up in the healthy notches by replacing the ham with extra veggies. 

Using the base recipe, you can swap the included veggies for ones that you have available or that your kids prefer. 

Using similar quantities to what we have here will make a light and fluffy muffin, or you could add even more veggies for a slightly heavier, denser muffin. It's fun experimenting.

Cooking with kids: Here's how to do it. Children will require adult supervision in the kitchen and may require some assistance with some of the steps. 

The picture steps below make it easier for children to follow along and do the cooking themselves. See the bottom of the post for the simple instructions in full.
Continue reading...


Play Food Sort

Mar 30, 2012


If you have pretend food at your house, help your children learn about the different food groups, as well as the basics of categorising, with a simple food sort.

Here I started with just 3 categories. Fruits, Vegetables and Other food.


I provided 3 containers and started them off with a few items from each category in each


activities for kids, healthy eating, learning food categories, sorting food
The finished sort. She noticed the difference in colours straight away.
(It's up to you how technical you get regarding fruits having seeds...)


Handy tips:

- Use this activity to talk about "sometimes food" and "everyday food"

- This activity led us to many discussions about various foods and where they come from. Be present for the activity and available for any questions they might have.

- Simplify this activity by cutting down the categories to sort into. Start with "Fruit and vegetables" and "Other food"

- Extend this activity by increasing the amount of categories to sort into. The "Other food" category included meats, grains, dairy and sweets/fats. Introduce your child to the Healthy Eating Pyramid that's used in your education system and use it as a guide for categorising foods. (Google search "Healthy Eating Pyramid *your state*" eg. "Healthy Eating Pyramid Victoria" for up to date nutritional information that your government is promoting)


Happy playing,
Debs :)


Look where else we are. Are you following along? :)
New Here? Subscribe to get all activities sent directly to you
Enter your email address:


Delivered by FeedBurner
Continue reading...


Cooking with kids: Sushi Rolls

Mar 3, 2012

Sushi rolls are a favourite food for my daughter and I. She has been eating it since she was very young and I'm happy that she loves it because it's healthy as well as yummy!


Here, she demonstrates how kids can make their own sushi rolls at home (with a little help from mum).

(Note: You will need specialist ingredients as well as a bamboo mat to roll the sushi. See "Some tips:" below the pictures for more details)


 Lay out the ingredients on a clear bench so they can be seen an accessed by your child easily


Put the sushi rice (short grain rice with rice vinegar) on your nori seaweed 


 Spread it out over the seaweed


 Lay your toppings down in a line in the centre of the rice


 When she was done, I was required to help roll it up


Lunch time. Time to eat! Yum


Some tips:

- When you buy the "yaki nori for sushi" (seaweed sheets), the back of the packet will have instructions on how to make the sushi rice and the best way to make the sushi rolls.

- We used tuna, avocado and cucumber for our filling this time. You can use whatever your child likes.

- Talk about all the steps involved with making sushi with your child before they start making it.

- As they make it, focus on one step at a time and any processes involved with that step.

- Simplify this activity by spreading the rice on the seaweed yourself and letting your child put the toppings on.

- Extend this activity by letting your child attempt all the steps and processes independently, including preparing the toppings, making the rice and rolling the sushi! (This bit can be hard for adults so some help might be needed for a while until they are competent. Remember that practice makes perfect!)


- Include the correct vocabulary for the techniques, ingredients etc when talking to your child to help extend their vocabulary and understanding

- Makes great party food!

Debs :)


Continue reading...


"Snackboxes" Healthy Food for Kids

Feb 29, 2012


Here I share a method (that's worked for us!), of feeding your child, healthy food in kid sized proportions throughout the day, without tantrums, fights or constant pestering!

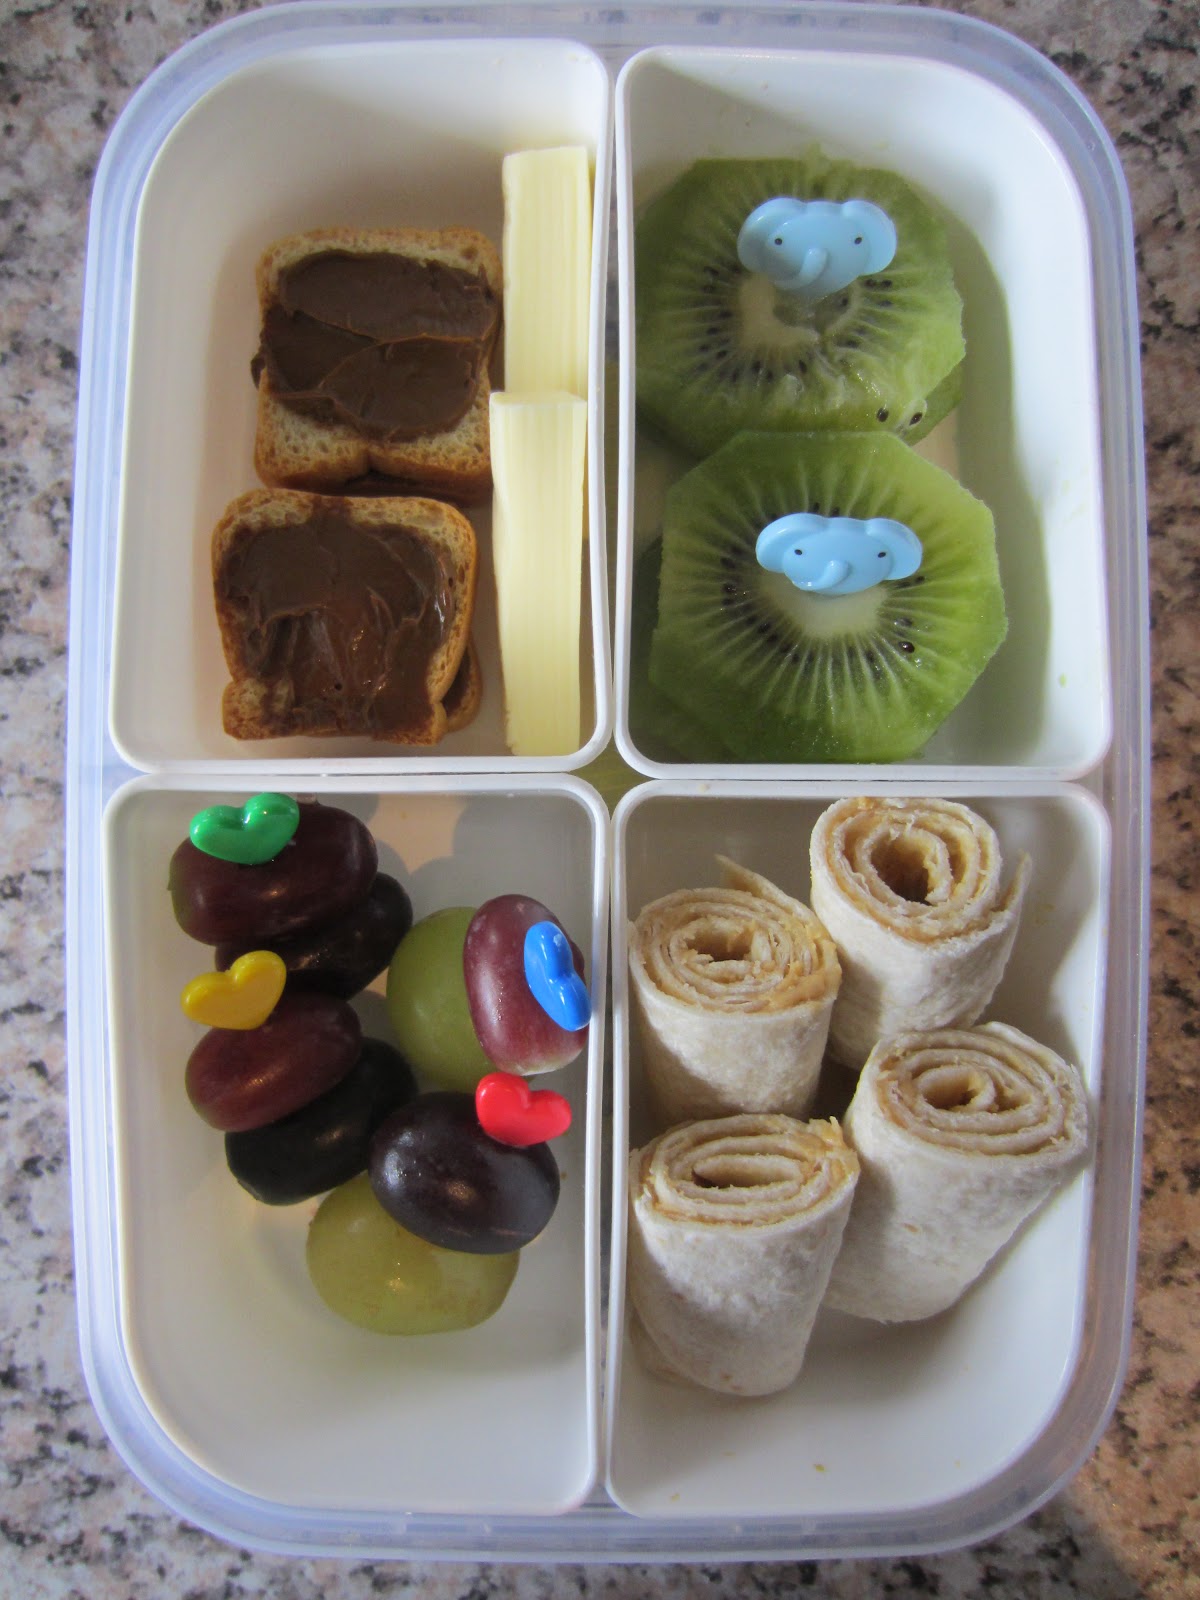
You can also use this style of food presentation for a healthy and rubbish free lunchbox for school.


Here are the 3 simple steps to give this method a try with pre-schoolers at home, with a more detailed explanation below the pictures.


1. Prepare the day's food (morning snack, lunch and afternoon snack) at the beginning of the day (not including breakfast and dinner)

2. Display it in a way that is appealing to the child and then show them and talk about their day's food

3. Put the "snackbox" on the bottom shelf of the fridge where your child can access it and let them choose what they eat and when they eat it.

Some examples of our "snackboxes"


Explanation:

My daughter, who has recently turned 3, has always been a food lover. This is generally a good thing as she will usually try new foods without too much resistance, but as she got older I was finding her becoming pickier, more demanding and it felt as though I was making her food, all day long.
On top of that, as she was eating (what felt like) constantly throughout the day, when it came to dinner time, we were struggling to get her to eat her dinner.

I decided it was time to give something new a try and thus, our "snackboxes" were born.

Now, in the mornings, as she eats a healthy breakfast, I prepare a "snackbox" of all the food that I want her to eat throughout the day. This includes morning tea, lunch and afternoon tea.

Seeing ALL her food for the day is very exciting for my daughter.. and the better presented, the more excited she gets about it. (Yes, EXCITED about cucumber sticks, haha).
Before, if she declared her hunger and I suggested some carrot sticks or cucumber or the like, we had a big fight over it and she would refuse to eat them. She wanted what she wanted (and it wasn't what I wanted).

The next part was relinquishing the control of what she ate when. I already regained control over what she was eating, but letting her decide what (from the snackbox) she wanted to eat and when she wanted to eat it was a little scary at first, but worked wonders!

Yes, I was worried (as was my husband) that she would just eat the entire day's food before the day had barely started, but I made a point of talking about her choices and how if she ate all the food too early, she would end up very hungry as the day went on and that there was no more food until dinner.

At the beginning, I did have to remind her of this many times and suggest she wait a while longer between snacks. Over time she has started to get to know her own body better and eats more out of hunger now than just entertainment.. AND, BONUS she is now hungry for dinner and so almost always eats all of what is put in front of her. Yay!


For more snackbox and food for kids ideas
check out my "Food for Kids" page and 
my "Food for kids" Album on my Facebook Page


Hope it works for you!


Edit: I've had many enquiries about the products I am using.

The container pictured here is the Decor Tellfresh Quarters container.
On their website it is listed as "Pumped® Sandwich & Snack Twin Pack / Sandwich Plus"


You can source the food picks off ebay by typing in "Bento" (for all kinds of amazing products) or "Food Picks" (If you're just being specific).


How do you ensure your kids are eating the right foods and right amounts? Feel free to share any ideas you use in the comments.


Happy eating,
Debs :)


New Here? Subscribe to get all activities sent directly to you
Enter your email address:


Delivered by FeedBurner

Are you on Facebook? We are and we'd love to see you thereHey, we're also on Twitter now too. :) 


Continue reading...