Showing posts with label hand eye coordination. Show all posts

Tinsel Weaving

Dec 22, 2012


Why not get festive and let the kids practice their hand-eye coordination and gross motor skills at the same time?

Let's try Tinsel Weaving!

Ages: 2+
(See Handy Tips at the bottom to see how to simplify or extend to meet your child's needs)


Materials: tinsel wreaths, any colour, sizes, lengths etc and tape


Tape one end of the tinsel down to make it easier for your child to weave with


Talk about the process of weaving. In and out, in and out.


This seems so simple yet can be really tricky whilst still developing hand-eye coordination.
Practice makes perfect


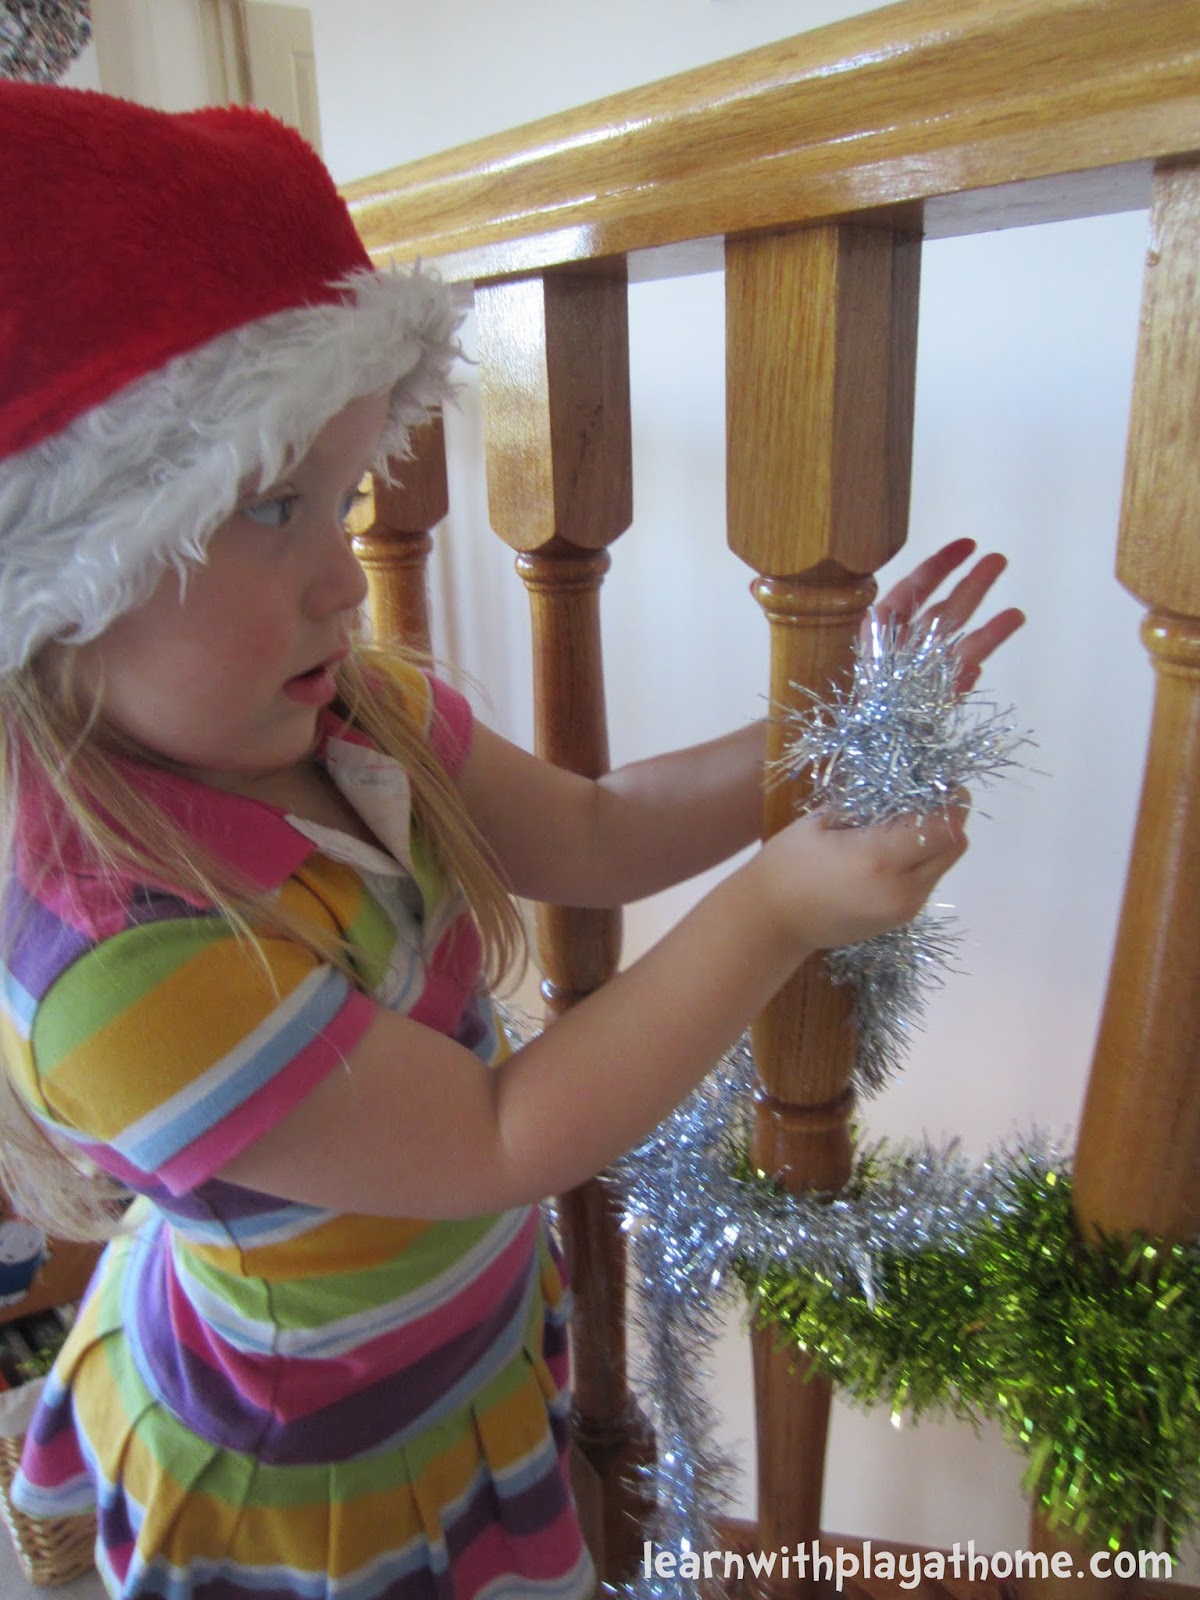
Have your child hunt out areas in the house suitable for large scale weaving. 
The chair backs worked well.


Handy Tips

- Simplify this activity by using shorter lengths of tinsel wreaths. The longer the length, the trickier it could be for your child to manipulate

- Extend this activity by using longer lengths of tinsel. Challenge your child to make patterns. Can they make a woven tinsel design? Spot all the places where you could weave around the house/room etc.

- Talk about textures, colours etc as well as encouraging the language of the technique of weaving. (over, under, in, out, through, interlaced etc) 

- Discuss the method of weaving and see if your child can find any woven materials in the house


Happy playing,
Debs :)


New Here? Subscribe to get all activities sent directly to you
Enter your email address:


Delivered by FeedBurner
Look where else you can find us! Come and play.

Continue reading...


Make a Cereal Bracelet

Jul 23, 2012

activity for kids


Age: 2-6+

Materials: Breakfast cereal with a hole in the middle*, string, stickytape
*we used "Cheerios" and "Heart Harmony" cereals .


To make it easier for little hands to thread, stick a bit of sticky tape around the end of the string to make it harder and pointier


Fabulous practice for developing fine motor skills and hand eye coordination


We were actually going to make a necklace but she didn't have the patience for that.


She was very excited about her edible bracelet!


Handy Tips:

- Simplify this activity by getting cereal with bigger holes. Fruit Loops would be easier for littler hands (and prettier too) but it's not a cereal we buy so we went with the healthier option :)

- Extend this activity by putting more of a focus on patterns. The greater the variety of cereal choices (or colours) gives your child more options for pattens. We started with loop-heart-loop, then she moved on to loop-loop-heart-loop-loop-heart... but then the pattern got a little lost as she decided the loops were much easier and faster to thread than the hearts :)

- Mix it up by having your child brainstorm other edible items they could thread and try making different lengths, patterns etc.

- Include some sorting practice with your child as well by starting with your cereal varieties all together in one bowl and provide some tongs for them to sort into different varieties/colours/sizes etc.


Happy playing,
Debs :)


New Here? Subscribe to get all activities sent directly to you
Enter your email address:


Delivered by FeedBurner


Are you on Facebook? We are and we'd love to see you thereHey, we're also on Twitter now too. :) 


Continue reading...


Baby Play: What's in the Box?

Jun 14, 2012


What's in the Box?


activities for babies, baby game, baby activity


Age: approx. 6 months to 2 years

Materials: Box with lid and things to put inside


 Today the box has things to shake. Mini maracas and shaker eggs


Baby is Learning:

- Fine motor skills
- Co-ordination
- Hand and eye coordination
- Manipulation
- Expectation
- Cause and effect (ie. moving this object creates this sound)
- Object Permanence (ie. just because I can't see it doesn't mean it's not there)
- How to remove a lid to reveal hidden objects
- How to replace a lid on a box
- How to grasp small objects
- What to do
- Emotions. Surprise, anticipation & excitement.


Handy Tips:

- Repeat this activity as often as you like as babies (and children) need repetition in order to consolidate their learning and understanding

- Mix it up by placing new and different things in the box for them to discover

- Extend this activity for older babies by having them replace the lid on the box or by guessing what's in the box first

- Talk to your baby about what they are doing. This will help them begin to understand the physical and mental processes they are going through as well as helping develop their vocabulary.

- Supervise. Babies must be supervised at all times. One of the main ways that they learn about objects is by putting them in their mouth, so please be cautious about what you are providing them or what they could access.

- Give your baby your time. It's the best gift you could ever give them.


Debs :)


New Here? Subscribe to get all activities sent directly to you
Enter your email address:


Delivered by FeedBurner


If you haven't come over to play with us on facebook yet, we'd love to see you thereHey, we're also on Twitter now too. 


Continue reading...


Cooking with Kids: Zucchini Slice

May 28, 2012


Looking for a healthy but delicious way to get some veggies into your kids?


Cooking with kids, healthy food, vegetables for kids

Try making them this easy Zucchini Slice... or better still, let THEM make it


Ingredients
  • 2-3 Zucchinis (2 large or 3 small)
  • 2 Carrots 
  • 1 Brown Onion 
  • 1 cup Self Raising Flour
  • 1 1/2 cups Grated Tasty Cheese 
  • 6 eggs 
  • 3 Bacon Rashes (optional)
  • 1 small can of Corn Kernels (optional)


Preheat your oven to 180°C

Crack the eggs into a bowl. Note how baby learns by watching


Lightly whisk the eggs


Take the time to talk about, learn and explore the different vegetables


Grease a 16cm x 26cm tin/dish. Perhaps to find the closest sized dish your children could help measure


Grate and chop all the vegetables (and bacon) and add to a bowl. You or your children could do this depending on their skill level.


Measure and add the grated cheese


Measure and add the flour


Add the lightly beaten eggs


Combine all the ingredients well


Pour into your lightly greased dish


Bake in your preheated 180°C oven for 30-40 minutes or until it is set the whole way through.


Allow to cool slightly before serving and watch your kids eat it all up.


Handy Tips:

- Allowing your children to help with the cooking from an early age holds incredible learning opportunities. From important maths concepts (such as timing, measuring, counting, comparing, weighing etc.) to learning safety skills, processes, healthy food choices, vocabulary, organisation and much more. Get them in the kitchen as early as you can and start stimulating their senses and letting them learn through observation.

- Use this time to talk about "Sometimes foods" and "Everyday foods" as well as learning about the different vegetables

- Simplify this activity by pre-chopping, grating and measuring  the ingredients yourself and allowing your child to do the pouring and mixing.

- Extend this activity by having your child attempt all the steps and processes independently

- An alternate zucchini slice recipe. This one uses oil so isn't as healthy but we've made this version as well and it's delicious. This is the version I make for parties.

- Continue to talk with your child about the methods they are using and the easiest ways to do them. Remember that practice makes perfect!

- We followed this basic recipe and just added in the corn. Other recipes call for oil or other things but we wanted to share this healthier version as this is the way we make it for the kids.

- For individual sized portions ready to go, bake in a muffin tray.


Debs :)

If you haven't come over to play with us on facebook yet, we'd love to see you there. Hey, we're also on Twitter now too. You can also subscribe (top right) so that you don't miss any fun activities.
Continue reading...


Soft Toy Toss

May 25, 2012


If you have a mountain of soft toys at your house like we do perhaps using them for some gross motor development  (otherwise known as, a fun and easy indoor throwing game) might appeal to your little one.

kids gross motor skill game, throwing practice


All you need are soft toys, a piece of masking tape and a toy bucket/basket/laundry hamper etc.


 Use your masking tape (or anything you have on hand, a skipping rope for example etc) to make a line for your child to stand behind. 


 She practiced throwing over-arm


Jumping for joy after getting it in


 Practicing her under-arm throw


Handy Tips:

- Simplify this activity by having the tub/bucket etc. much closer and using instruction and directions to help your child learn to throw. Encourage them to watch where they want the toy to land; follow through with their arm in the direction they are trying to throw etc

- Extend this activity by moving the tub further away from your child. Ask them questions about the different toys they are throwing. Why did that toy only land that far when you threw it the same as the previous toy? This engages their thinking and encourages them to think about the most effective toss for different types of toys. Some toys are heavier, some are lighter, bigger, smaller etc. This makes a difference to how they need to be thrown and the force behind the toss. Discuss this with your child. You could also incorporate some measuring to see how far away the tub is from the line and how much further away you can move it after each level.

- Practicality- Using a larger space in your house for something like this is a good idea and just remembering not to have them aiming towards your finest Ming vase goes without saying :) Perhaps reminding them that this is a set up activity and that we don't play this game inside with other items or without permission.

- Control- Encourage them to demonstrate control. If they can't manage the control and they aren't actually aiming for the tub etc. perhaps try again at another time. This will save your sanity (and house).

- Skills- reinforcing the gross motor skills and hand eye coordination needed for this task is important so that your child can improve their skills.

- Keep Playing- Move the tub further and further away from your child to challenge them until they can no longer make the distance. Learn with them. Do they need to adjust their throwing style for a further distance?


Debs :)


Look where else we play too. Come and play with us :)
New Here? Subscribe to get all activities sent directly to you
Enter your email address:


Delivered by FeedBurner
Continue reading...


Hole Punch Art

May 14, 2012


This is a fun and easy activity that encourages creativity whilst also practicing fine motor skills, hand-eye co-ordination and other skills. It also makes a fabulous piece to display or use later.

Madeline is 3 years old. See the handy tips at the bottom for ideas on how to simplify or extend to suit your child's level of development.


easy art for kids, activity for kids, children's art, fine motor skills
You will need strips of coloured/patterned paper (double width so that half can be punched and half overlapped), a hole puncher, a piece of backing paper and a glue stick


Punch holes along one side of a paper strip


Glue a width of the paper strip on the backing paper


 Stick down a strip with the hole punched side at the edge of the backing paper


 Time for more hole punching and practicing coordination and fine motor skills


 Overlap each strip of paper so that the holes punched in the top strip show the colour of the last strip like this (I couldn't resist making one too as they looked so pretty)


 Continue overlapping the hole punched coloured paper strips until the entire backing paper is covered


Let your child choose the colours and order


 She was very happy with the end result


Madeline and My Hole Punch Art


Handy Tips

- To simplify this activity a standard 2-hole, hole puncher would be easier for littler hands. If this is also too hard, provide the child with pre-punched strips of paper and help them with the pasting and overlapping

- To extend this activity, your child could be responsible for cutting the strips themselves. Also encourage them to choose the colours and design. Could the strips be overlapped in a different way to create a different effect? Let them experiment and create

- Pride. Making things that look visually pleasing as the end result help your child feel proud about what they have created. Giving your activity a special purpose, (like a gift for a loved one) can also help instil some pride in their work.

- Use and explain new language and descriptive words like, "overlapping" This will help with their language development.

- Demonstrate and discuss particular skills, such as hole punching or overlapping, if your child is new to these techniques

- Use whatever hole punch you have at home, it doesn't need to be a single one like ours.


Debs :)
Look where else we are. Are you following along? :)
New Here? Subscribe to get all activities sent directly to you
Enter your email address:


Delivered by FeedBurner

Continue reading...